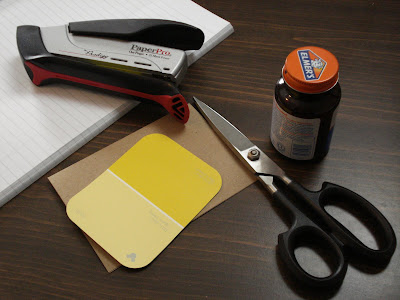
 A few days ago I moved into my new house. I now have a craft room/office, so the pressure is on to start creating. I finished my new portfolio site today. On Monday night while Alex checked his e-mail, I glanced at my craft table and saw two things: a note card made from recycled paper and some unused paint swatches. And in the spirit of the craft trend to reuse found items, I give you this recycled paint swatch notebook! (in under 5 minutes!)
 What you'll need:
1. a paint swatch (or other decorative item of about the same size)
2. a notecard (or a sturdy paper grocery bag to create one)
3. scissors
4. notebook paper/white paper
5. stapler
6. rubber cement/strong glue
7. something heavy
8. 5 minutes
 First, bend the paint swatch in half. You could use a fancy paper folder. I didn't. Again, this was all on a whim. Also, I don't have one.
 Cut sheets of paper to fit. I basically cut a few sheets of notebook paper in half. Just make sure they fit nicely into your card.
 Now, we staple.
 I lightly coated the underside of the paint swatch to stick it to the note card. I wasn't wild about the look pre-gluing.
 Finally, I found the heaviest item on the table and set it on top of the notebook overnight. I did this around 10:30pm so I was already heading to bed anyway. I'm not sure if you need to let it sit so long.
 Enjoy your notebook and a sense of accomplishment! All that in 5 minutes! (This is the other side, just in case you were curious how that turned out) ;)
edit to add: posted on craftershock :)

I love making books and I think using the paint swatches is a brilliant idea! Thanks for sharing.
ReplyDeleteOh this is way cool! I love the color that the paint chip brings. I'll be linking.
ReplyDeleteThat's a really cool idea! It makes me wish i had some paint samples lying around.
ReplyDeleteThere's a really simple trick to making rubber cement last a long time: apply rubber cement to both surfaces, let them dry. Once they are dry, very carefully press the two surfaces together.
I love the ideas of may your own cute notebook vs. using the boring ones sold in stores. This is the easiest tutorial I've seen yet!
ReplyDeleteThanks for all the comments. I'll keep trying to make some easy projects. ;)
ReplyDeletea fellow columbus, ohioian? cool! you should make me one of these... :)
ReplyDeleteThis is one of the easiest tutorial of creating a notebook. Good idea!!!
ReplyDeletethink this will be my TAD for today. Thanks so much.
ReplyDeleteI think stitching is nicer than stapling, and it's really easy to sew a basic spine with 3 holes and some thread. Just look up a pamphlet stitch and you'll find plenty of info.
ReplyDeleteI love this notebook! When I found the link I dove right in. Unfortunately I didn't have any notecards laying around, but I made my own version with an old greeting card. Thanks for the great idea.
ReplyDeleteCool. Do the pages' ends look uneven? I bet you could fold each page individually and then glue them instead.
ReplyDeleteHi Lizzard,
ReplyDeleteThanks for the tutorial. It looks simple enough to make. :) I've posted about this tutorial at my blog.
This would be great to do with kids, too -- so simple! Thanks for the inspiration!
ReplyDeleteGreat tutorial and I agree with Joanne, it's a great project to do with kids!
ReplyDeleteThanks for sharing!
always frustrated with ugly notebooks, i googled something random like 'how to make a notebook' and came across your link. which took me to your portfolio. which made me realize we're both ou viscom alum (i'm actually more of a recent grad, baby alum, but anyway) just had to say i love your idea and am going to try it out right now ... because as a designer, i would have 100 poor little paint swatches under my bed that have been waiting for a reason to be used! thanks and go bobcats!
ReplyDeleteThis comment has been removed by a blog administrator.
ReplyDeleteThis comment has been removed by a blog administrator.
ReplyDeleteThis comment has been removed by a blog administrator.
ReplyDeletethis is very helpful one day I hope to be a writer thank you! by the way awesome!!!!!!!!!!!!!!!!!!!!!!!!!!!!!
ReplyDelete